Uploading Quick Office HD Pro documents to your Dropbox account on the iPad

If you are wondering how to upload documents from Quick Office Pro to your Dropbox account, there is a way and it is a very straightforward process….
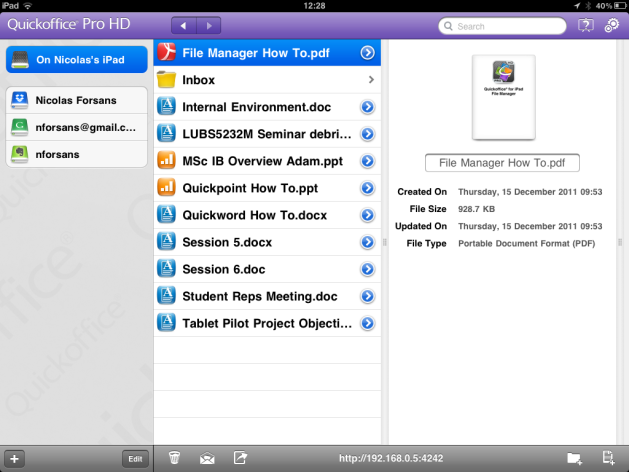
  •  Open Quick Office Pro HD on the iPad and notice on the left hand side both your iPad’s drive (“on Nicolas’s iPad”) and any other cloud-based accounts you might have set up (Go to Settings to set them up). My Dropbox account is referred to as “Nicolas Forsans” in the screenshot below. You can also see my GMail account below it, followed by my Evernote account.
  • Identify the file you’d like to transfer onto your Dropbox account. For the sake of this tutorial I will transfer the default “File Manager How to.pdf” file which comes with Quick Office by default
  • In the same way as you would select the file and send it by email or to the bin (notice the icons at the bottom of the screen, one for the bin, one for email, one for sharing), long-press the selected file name and move it to the icon that represents your Dropbox account on the left-hand side of the screen. Note: I could do the same thing to send it to my Evernote account.

  • As you drag the file to your dropbox account, the file manager no longer displays files that are locally stored onto the iPad – instead it shows you the various files and folders that make up your Dropbox account. You can then drag the file onto one of the sub-folders or (and it ill probably be easier that way) just drag it to the root of your Dropbox folder by releasing it above the Dropbox icon on the left hand side, as I’ve done it on the screenshot – you can always go into your dropbox folder later on and move the file from root to individual sub-folders
  • Job done: your file now appears in your Dropbox account; Obviously you would use the same method to bin the local file by dragging it to the bin icon, email it or send it to any other cloud-based account you might have set up

Lots of useful tips for using your iPad

Clipped to my Scoop.it site is an exhaustive list of tips covering every aspect of your iPad – get it there. We’ve covered a number of helpful tips earlier, and I will consolidate all those tips together soon so check again this page for the most exhaustive list of tips (ever produced!).

Bookmark synchronisation across multiple devices

Over the past year I have used various tablets, running both Android and iOS. Although at first it feels like having yet another device, there are ways to set them up so that you can enjoy the same experience, whichever device you are using.  Having all your bookmarks synchronised across multiple devices is of great help if you are looking to minimise the inconvenience associated with the use of different devices.

Android tablets

Android tablets work best with Chrome, Google’s lightweight and probably best browser around. Your android tablet automatically imports your Chrome bookmarks and keep them in sync. If you are using a different browser (Firefox, IE or Safari) best to export your bookmarks as an HTML file, and import them into Chrome – even if you do not intend to use Chrome as your mainbrowser. As long as you set Chrome with your Google account, all your bookmarks will automatically appear on your tablet and be kept in sync at all times. So changes made on the tablet will reflect into Chrome, and vice versa.   Unfortunately the feature is not available on Android phones as they do not make use of Chrome, but the feature will be rolled out as phones get upgraded to the latest version of Android, Ice Cream Sandwich aka Android 4.0 for which Google has just released Chrome.

IPads

IPads work best with Safari, and you do not have to use a Mac to operate Safari – download Safari for both Mac and PCs running Windows Vista/7. On the iPad, Safari comes pre-installed so you don’t have to download it. As long as you activate iCloud on your iPad (go into Settings/iCloud and switch on bookmark sync) all your bookmarks will be in sync. To import your bookmarks from IE or Chrome into Safari on the desktop, you will need to export them from IE or Chrome into an HTML file. Then, double click the file and the list of favourites will appear in Safari. You can then arrange them into folders in Safari. As long as you have downloaded and activated iCloud (look for a forthcoming post on iCloud) your bookmarks will be kept in sync between Safari on the pc and Safari on the iPad – and the synchronisation is instantaneous!

Alternatively, Google has now released its (free) Chrome browser for iPads. The only downside of Chrome is that you can’t set it as your default browser on the iPad – this is one of many annoyances with Apple’s walled garden. This means any http link will automatically open in Safari, not Chrome. You will have to launch Chrome, then copy/paste the url in order to open it in Chrome. Having said that, I read Chrome is performing very well on the iPad. If you use Chrome, log in as yourself and all your Chrome bookmarks will automatically sync across all your Chrome devices (web, iPad and of course, Android devices).

Having all your bookmarks in sync across multiple devices is a winner and a real productivity boost.

Projecting directly from your iPad

Below is the link to the VGA cable I used to project directly from my iPad. It is a standard iPad Dock Connector to VGA Adaptor, retailing at Amazon for £12.67

Image

Making a start with your new iPad…

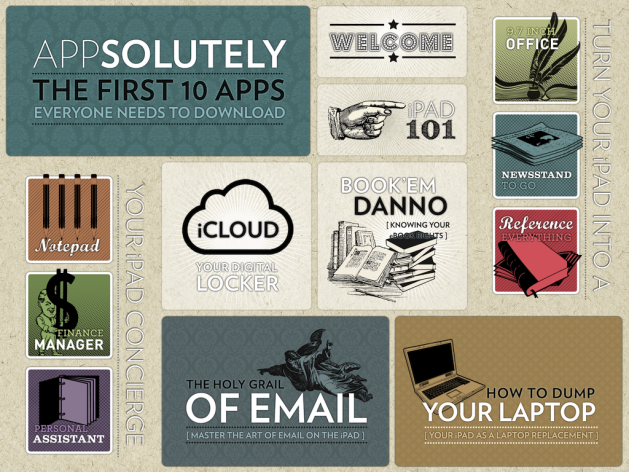
AppStart for iPad could very well be first (free) app anyone should download on their iPad to uncover the many functionalities of the iPad. No, it’s not a boring manual – it is a beautiful app (the designers have done a great job!) organised in many sections that allows the reader to understand how their iPad works, and what functionalities they can leverage.

It is organised around sections, for example “browse the web”, “organise your photos”, “the holy grail of email”. I  particularly like the “How to dump your laptop” section with their selection of productivity-enhancing apps, some of which we have trialled during the first pilot. Also noteworthy are their “9.7 inch office”, “the lowdown printing, or how to print with no strings attached”, “apps for students / moms / dads / musicians” and many other useful sections. They basically cover everything with a great selection of the most popular apps that help get the business done.

And it’s so beautifully done that you won’t get bored reading it!

Highly recommended. Go and download it now, it’s free. The very first app that should come pre-installed on all our iPads!

IPad 3 tips: navigating the screen using your fingers

(contributed by a student on the course in 2012)

As I have used IPad 2 for several month, I would say that there are still many techniques i never heard before, but these techniques are very useful and efficient for users to know the charm of IOS.

Tips for navigating the screen using your fingers

1. when you put all five of your fingertips on the screen and pinch them together, you would find the home screen without tapping the home button.

2. when you place four of your fingertips on the display and slid them up to the screen, the multitask bar would be shown as well as the way you double tap the home button.

3. when you put four of your fingertips on the screen and slid them to left or right side, this would quickly help you switching between apps which you are using now.

These three tips would help you get rid of the home button and extend its life expectancy.